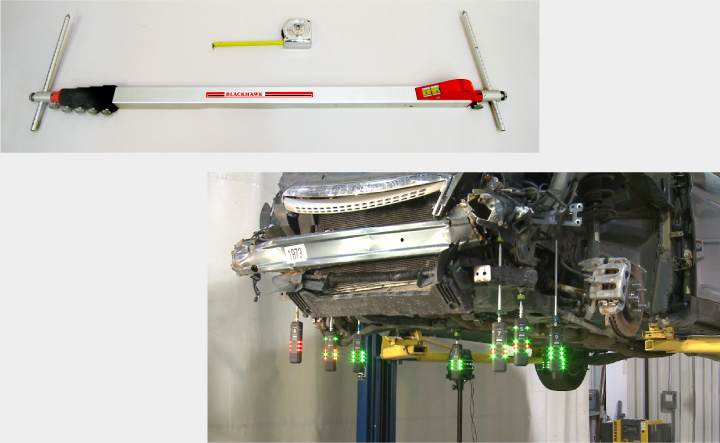
I-CAR has been emphasizing the importance of three-dimensional measuring since its founding in 1979, but is it really required to repair a vehicle? After all, three-dimensional measuring systems are considerably more expensive compared to the much more affordable tape measure or tram gauge (see Figure 1).
A Real Life Experience
Recently, our friend Sam (not his real name, but his story is), found himself having to get estimates for his collision damaged car. The first collision repair facility was chosen, and the vehicle was brought in for an estimate. During the estimating process, Sam asked what type of three-dimensional measuring system the facility used. The estimator promptly replied "none." Interesting. The car didn't look structurally damaged, I'm sure the estimator was wondering why Sam even cared.
So, it was on to the next repair facility. While talking to the estimator, Sam inquired again, "What type of three-dimensional measuring do you use?"
In a too familiar response, the estimator replied, "We don't really have one."
The next stop was the last repair facility scheduled to write an estimate. Sam watches the estimate being written and asks the question, but this time, the answer is different, "We have a computerized measuring system."
The quest was over. Sam knows who's going to be repairing his vehicle.
The question is, why is it so important for Sam to have a shop that can perform three-dimensional measurements? The answer is simple. Three-dimensional measuring provides an accurate assessment of damage. This allows collision repair technicians to document vehicle measurements before and after the straightening process, ensuring Sam that his vehicle was fixed properly.
In Sam's case, it turned out that his vehicle's front rails were up 20 mm from specification. This wasn't found until the vehicle was placed on a three-dimensional measuring system for repair. If a repair facility was using a tram gauge or tape measure during the repair, would this have been caught? The vehicle looked within specification, and there were no obvious panel gap misalignments or other visual indicators that provided the estimator with clues to the structural damage.
Making the Investment
Even in the best economic times, a three-dimensional measuring system is a substantial investment for one piece of equipment. Is it worth it? Joe Blanton from Car-O-Liner was essentially asked this question. Is cost an issue to shop owners when deciding to make a purchase? Joe states that the value of time savings and increased productivity eventually offset the initial investment.
Another reason to invest in a three-dimensional measuring system is the assurance that the vehicle has been restored to the proper specifications. Then there's keeping up with changing vehicle technology. With advancements in vehicle design and increased use of high-strength steel, collision energy is following a different load path. The load path is essentially the route collision energy travels through the vehicle. This new path means that collision energy is traveling into areas not commonly seen before, deeper into the vehicle. Additionally, these vehicles often have a tighter tolerance, requiring greater emphasis on restoring the original vehicle specifications for proper vehicle performance. Therefore, three-dimensional measuring can be a huge benefit in identifying any misalignment.
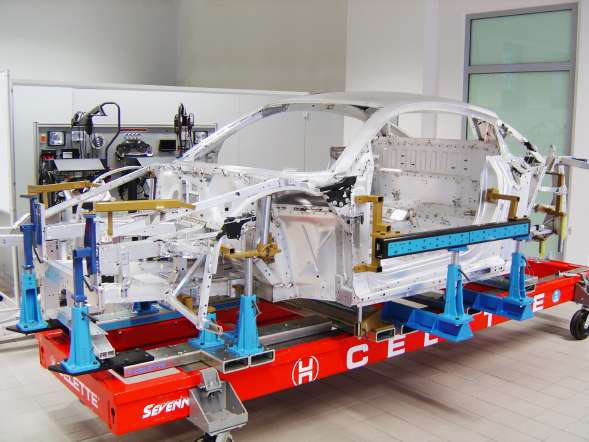 Figure 2 - A fixture system, such as this Celette bench, is used to perform three-dimensional measuring.
Some vehicle makers make specific recommendations regarding the use of three-dimensional measuring equipment for vehicle repairs. General Motors (GM), for example, states in their part-specific collision repair procedures to "use three-dimensional measuring equipment." FCA/Stellantis states that when restoring a collision damaged vehicle, that "all structural distortion has been identified and corrected using appropriate structural straightening equipment ("frame rack") and a three-dimensional measuring system."
Other advantages of three-dimensional measuring include accuracy, reduced time to make the measurements, and the ability to repeat and verify specific measurements so they can be documented both before and after repairs are complete. Three-dimensional measuring is also ideal for damage analysis. Providing printed out measurements with the damage estimate to the technician helps with ordering parts and calculating repair times, reducing supplements.
According to Richard Perry of Chief Automotive Technologies, when asked what message he would 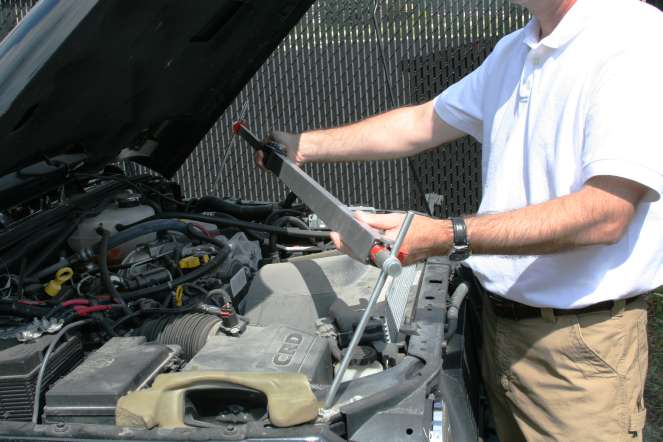 Figure 3 - Point-to-point measurements are often used during damage analysis to identify potential structural damage.like to communicate to the collision repair industry about three-dimensional measuring, he stated, "Moving forward, measuring the vehicle with structural damage during the estimate should become as common as getting the VIN. This will reduce the need for supplements and reduce the cycle time for the vehicle's repair."
Making three-dimensional measurements requires understanding that all measuring points are based on length, width, and height. If using a computerized measuring system, these planes are electronically formulated using the measurements of the center section, and all the other measurements that are taken are relative to those planes. Mechanical systems, or fixture systems, perform a similar function, but use the tip of the measuring pin and a vehicle reference hole to determine alignment (see Figure 2). Point-to-point measurements are very good during damage analysis to identify potential structural damage (see Figure 3).
This article first appeared in the September 8, 2011 edition of the I-CAR Advantage Online.
Related I-CAR Courses
Article validated in 2024








 Print
Print