


 Print
Print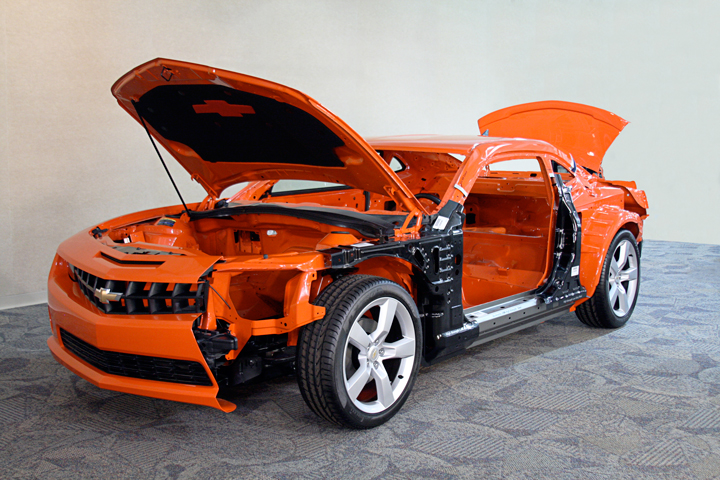
The 2010-2015 Chevrolet Camaro is built on a General Motors global rear-wheel drive platform and shares some of the same chassis parts with the Pontiac GTO and G8. Although the new Camaro looks like a 1969 Camaro, it is quite different from a collision repair point of view. This article covers some of the repair options and considerations when working on a collision-damaged Camaro. General Motors body repair procedures and mechanical/electronic systems can be accessed by visiting www.acdelcotds.com.
Front Lower Rail Sectioning
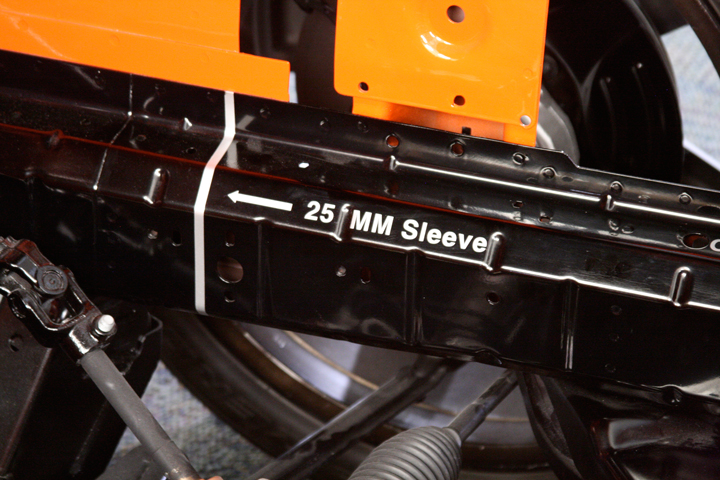 Figure 1 - The sectioning location for the inner lower front rail is identified rearward of a reference hole.The front half of a front lower rail may be sectioned using two separate procedures for the inner and outer rails. However, either of these may be done individually if damage is limited to only one side. The cut locations between the inner and outer rails are slightly offset from each other. For the inner rail, the cut location is identified by measuring from a reference hole (see Figure 1). The outer rail is sectioned at the rear edge of the strengthening bead located between the wheelhouse reinforcements.
Different joints are used for the inner and outer rails. A butt joint with backing is specified for the inner rail, using a 25 mm sleeve for the backing. The sleeve can be made from an unused portion of the service part. For the outer rail, a flanged lap joint is specified. The service part comes with a pre-stepped portion that fits under the remaining portion of the original rail during installation. Both joints are welded with a combination of GMA plug welds and seam welds. The complete upper rails are available as service parts and replaced at factory seams.
Repair Options for the Rocker Panels
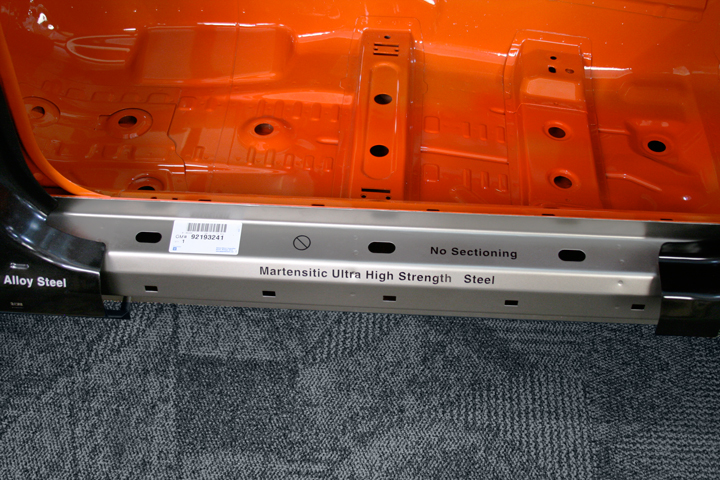 Figure 2 - The rocker panel reinforcement is made from martensitic ultra-high-strength steel.The outer rocker panels may be sectioned on any of the straight areas on the bottom edge of the door openings. A sectioning joint on the outer rocker panel should be done using a 25 mm overlap joint. The service part is cut to overlap the original outer rocker panel 25 mm. The joint is then seam welded.
The rocker panel reinforcements are made from ultra-high-strength steel (UHSS) and cannot be straightened or sectioned (see Figure 2). The entire rocker panel reinforcement must be replaced at factory seams if damaged.
Sectioning the Outer A-Pillar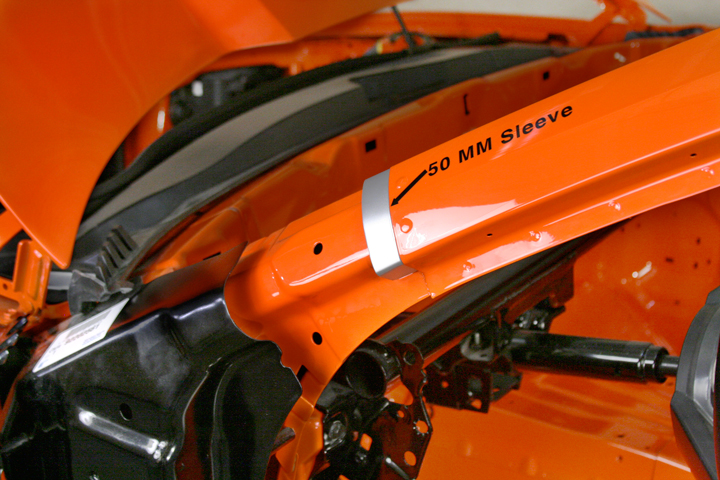 Figure 3 - For the A-pillar, a 50 mm sleeve (backing) may be made from an unused portion of the service part.
The lower outer A-pillar may be sectioned on the straight areas of the upper A-pillar and rocker panel. A 50 mm backing is specified for the A-pillar sectioning joint in the windshield area (ee Figure 3). The backing should be trimmed to fit behind the sectioning joint and is attached with plug welds to the vehicle and service part. For the rocker panel sectioning joint, a 100 mm backing plate is specified.
B-Pillar Reinforcement Sectioning
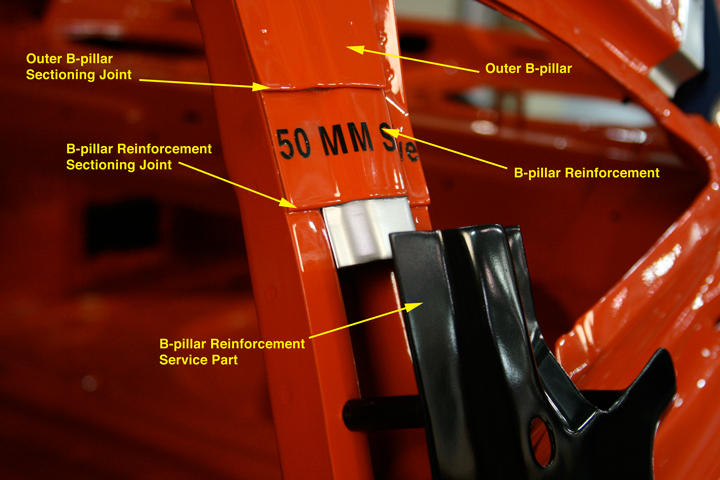 Figure 4 - Various panels and sectioning joints are called out for the B-pillar.The B-pillar reinforcement is made from high-strength, low alloy steel. The sectioning joint should be located 50 mm below the sectioning joint for the outer B-pillar. Refer to the quarter panel sectioning procedure for sectioning the outer B-pillar. A butt joint with backing is used for the B-pillar reinforcement sectioning joint (see Figure 4). The backing can be made from an unused portion of the service part.
Quarter Panel Sectioning
The quarter panel may be replaced by sectioning the upper portions of the B- and C-pillars and the rocker panel. The illustrations in the procedure show the general locations for the cuts. The B-pillar reinforcement is used as a backing for the outer B-pillar sectioning joint (see Figure 4). For the upper C-pillar, a 50 mm backing is specified for the sectioning joint. The backing should be made from an unused portion of the replacement part and is attached to the vehicle and service part with GMA plug welds, spaced 40 mm apart. Also note that the foam carrier can be used as a dam for installing replacement foam (see Figure 5). The plastic carrier is available as a replacement part.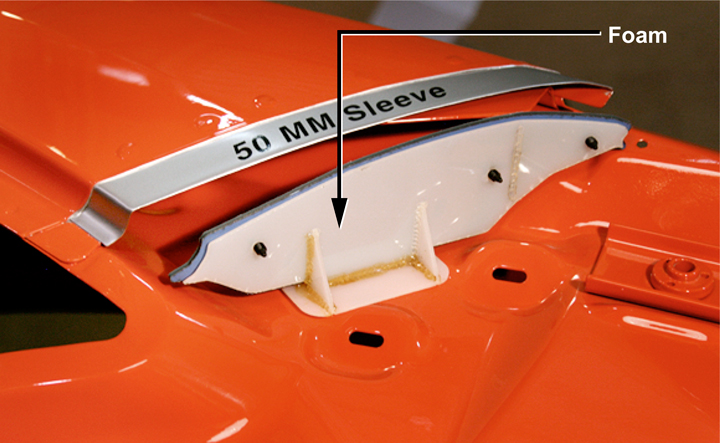 Figure 5 - The foam carrier in the C-pillar is available as a service part.
General Welding Requirements
General Motors requires the application of weld-through primer to all welding surfaces. Also, use a skip or stitch type of welding method when making seam welds to control heat. It is commonly recommended to trim service parts to allow a 1½ metal thickness root gap for sectioning joints.
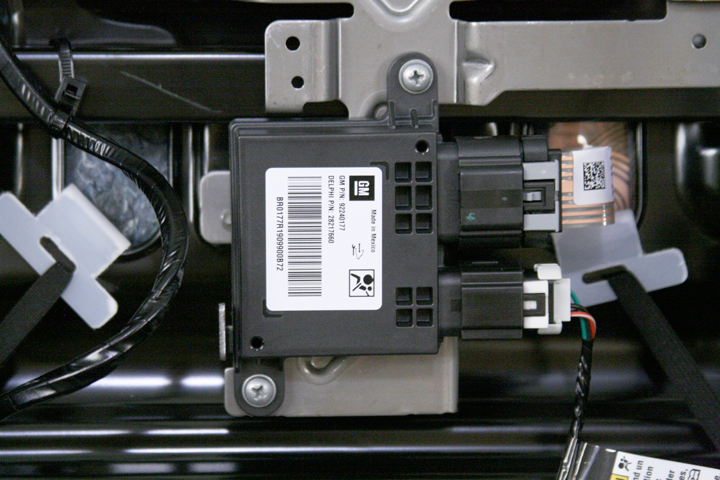 Figure 6 - The control module for the passenger presence system is located under the front passenger seat.
Passenger Presence System (PPS)
The occupant classification system is designed to turn the front passenger airbag OFF if it is not occupied, or occupied by a small child. General Motors refers to this system as the passenger presence system (PPS). The PPS on most GM vehicles requires replacement as an entire calibrated assembly, including the sensor pad, seat cushion foam, and the control module. However, the Camaro has a new type of PPS that allows the control module or seat cushion to be replaced separately (see Figure 6).
The PPS must be rezeroed if any parts of the system have been replaced or the seat cushion trim attachments have been removed. However, the 2010 Camaro is not supported by the Tech 2 scan tool. A multiple diagnostic interface (MDI) unit (see Figure 7) and global diagnostic system (GDS) software is required for rezeroing the PPS on a 2010 Camaro.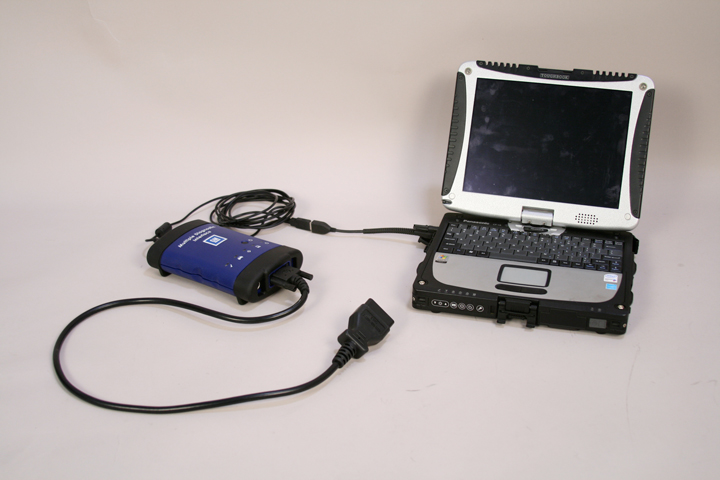 Figure 7 - The multiple diagnostic interface (MDI) connects to a personal computer and is used in conjunction with Global Diagnostic System (GDS) software.
Tire Inflator Kit
No, you probably didn’t misplace the spare tire. A tire inflator and sealer kit (see Figure 8) is standard on all models. However, a conventional spare tire is an option on LS and LT models.
Conclusion
Although the 2010-2015 Chevrolet Camaro has a nostalgic appearance on the outside, the construction and repair methods required are entirely modern. There are several partial replacement procedures that make this car quite repairable in the event of a collision. 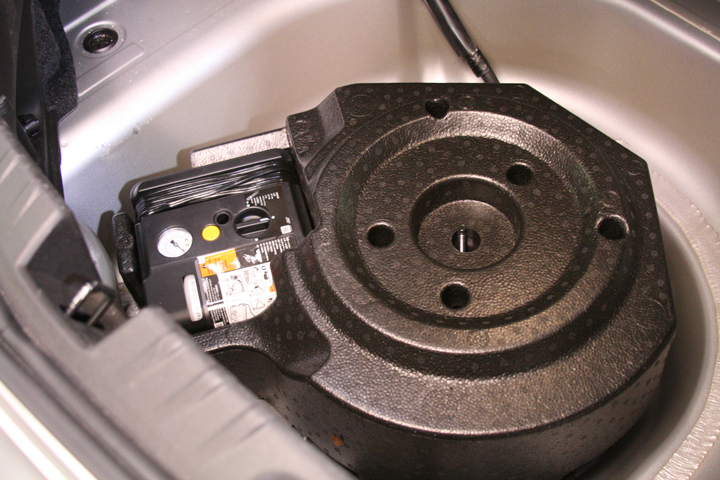 Figure 8 - A tire inflator kit is located in the trunk.
This article first appeared in the December 1, 2009 edition of the I-CAR Advantage Online.
Related I-CAR Courses
Article validated in 2024