


 Print
Print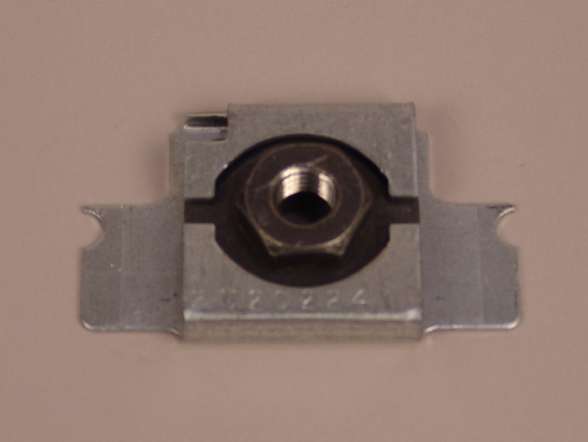
Beginning with the 2009 model year Ford F-150, the cab body mount bolts are secured with a cage nut. The cage nut is held in position inside a cage nut retainer that is attached to the inside of a floor crossmember. The crossmember is attached to the underside of the floor pan, which creates an enclosure for the cage nut. The retainer has two nut retaining tabs, one on each opposing side of the nut that are folded against the nut to hold it in place (see Figure 1).
In some instances, the cage nut may spin when attempting to remove or install a body mount bolt. If the nut spins, it will have to be accessed and secured in order to complete the bolt removal and the installation process.
Accessing the Cage Nut
Accessing the cage nut will require drilling a hole from the top of the floor pan at the cage nut location. Be careful not to drill into the cage nut retainer. Ford service information specifies using a 50 mm (2") hole saw for this procedure (see Video).
 Figure 2 - Shown are two of the body mount/cage nut locations on the floor pan of this F-150 SuperCrew.Accessing the drilling locations on the floor pan will require removing certain parts, and pulling back the carpeting. Depending on the cab style, parts that may require removal include the scuff plate trim panel, console, and seats.
The locations of the body mount cage nuts vary depending on the F-150 cab style. Locations for the Regular Cab model will differ from those of the SuperCab and SuperCrew models. Locations for the SuperCab and SuperCrew are the same (see Figure 2). Refer to the appropriate service information for the specific location and procedure for drilling the hole.
Repair Considerations
Through the drilled hole, locate the cage nut retainer tabs and bend them upward to allow access to the cage nut (see Figure 3). Use a suitable tool to hold the cage nut and remove the body mount 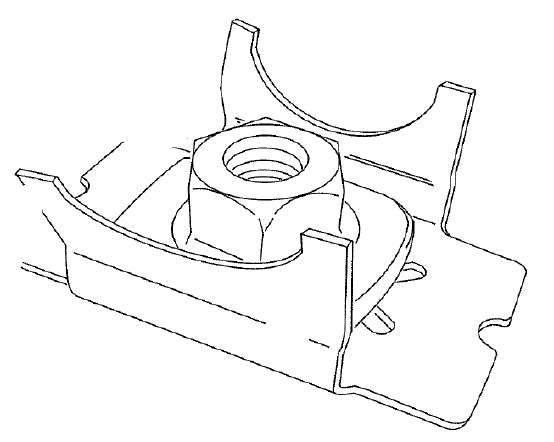 Figure 3 - Shown is a cage nut retainer with the tabs bent upward allowing access to the cage nut.bolt.
The cage nut may be reused if the threads are not damaged. If damaged, it must be replaced with the correct part number (#78101C38). Ford service information warns against using a standard nut as a replacement, as this may result in damage to the vehicle.
The body mount bolts are one-time use, and must be replaced once removed. Be sure to replace these bolts with the correct part number. The bolt part numbers vary depending on the cab style. Torque the new bolts to 115 N"¢m (85 lb-ft).
A service plug (part #W651023-S300) is available to cover the hole following installation of the body mount bolt.
Conclusion
When attempting to remove the body mount bolts on some Ford F-150 models, be aware that there may be situations when the cage nut may spin preventing removal of the bolt. Removing the body mount bolt will require using a hole saw to provide access to the cage nut in order to secure it to prevent it from spinning when turning the bolt. Locations of the cage nuts vary depending on the F-150 cab style. Ford service information includes procedures for locating and drilling the holes.
This article first appeared in the December 22, 2011 edition of the I-CAR Advantage Online.
Related I-CAR Courses
Article validated in 2024