


 Print
Print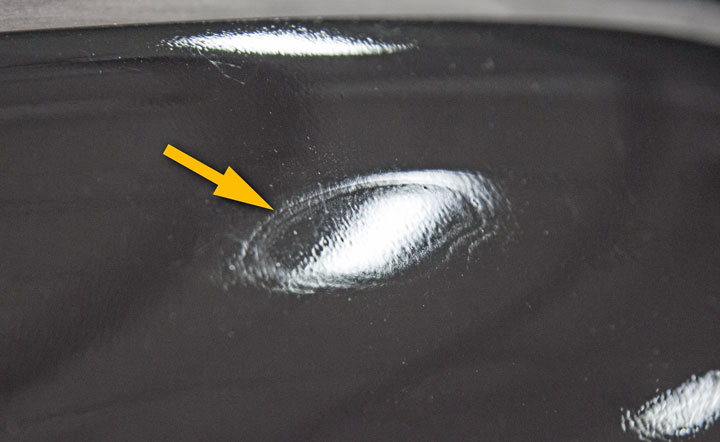
Sometimes, going back to the basics can make the difference between a quality repair and a failed repair. When repairing an outer panel, contour mapping can occur. This is where a repair was improperly prepped for refinishing, and the repair area can be seen through the basecoat and clearcoat.
Some causes of contour mapping are:
- an improper featheredge.
- Make sure to follow standard operating procedures (SOPs), or best practices specified by the abrasive product maker. This will ensure that the paint edge around the repair area is evenly feathered.
- body filler that was not properly applied or sanded.
- Body filler should only be applied over an existing finish if the product maker says you can (glaze, for example, can extend onto sanded clearcoat). Look up the SOP for sanding the body filler to avoid heavy in-line scratches. Do not apply body filler over any existing finishes, or un-prepped surfaces. Look up the product maker’s product sheet for information on substrate requirements. Using SOP’s for sanding will reduce deep in-line scratches on the body filler.
- hard tape lines.
- This typically happens in the priming process, when the panel is masked too close to the repair area. Allow enough room around the repair, so that the primer can be blended into the panel evenly.
- when primer shrinks into deep sand scratches.
- Check with the product maker for information on what grit sand paper is needed to remove surface imperfections before priming.
By concentrating on the basics, you can avoid many of the problems that would otherwise prevent complete, safe, and quality repairs.
Related I-CAR Courses
Article validated in 2025